IKEA Hack: DIY Framed Cork Board
Back in January I posted the IKEA Hack I did with the my UNG Drill Frame. See the post here.
Well I realized that every time I wanted to change out the pictures in my frame I had to take off the back, remove the taped pictures, and tape new ones in there. So I came up with a time-saving solution: I would turn my frame into a cork board!
I shopped around for a roll of cork. After comparing reviews and pricing, I bought a Quartet Natural Cork Roll, in size 24×48″. If you’re using a smaller frame, you could buy a smaller roll, or even just cork sheets (which in general, are less expensive). I found that this cork was really easy to cut, and didn’t fall apart or rip, which I was worried about.
Supplies:
- UNG DRILL Frame from IKEA
- Gold Spray Paint (& Primer)
- Roll of Cork
- Acrylic Paint (whatever color you prefer)
- Hot Glue Gun
- Pushpins
Directions:
- Prime and Paint the Frame. Set Glass aside, you won’t need it.
- Lay the roll of cork out. Use the cardboard backing from the frame, and trace around it, with a Sharpie. Cut out the cork piece.
- Using a glue gun, glue the cork onto the cardboard backing. Start at the top and glue around the edge in small sections, stopping to press down and let the glue dry.
- Paint the cork the color of your choice. I just used some black acrylic paint I had laying around. Cork soaks up paint really well, so I only needed one coat.
- Place the cardboard backing/cork back into the frame,and that’s it! You have a framed cork board!
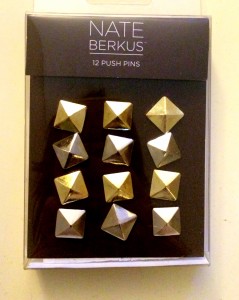
**I bought these Nate Berkus Push Pins from Target, for $3.99:


What a great idea 🙂 and I like the tacks you selected. Perfect combo!