
Happy Saturday friends!
I like to spend my weekends relaxing, crafting, netlfixing, blogging, erranding, etc. Also, I clearly love making up words.
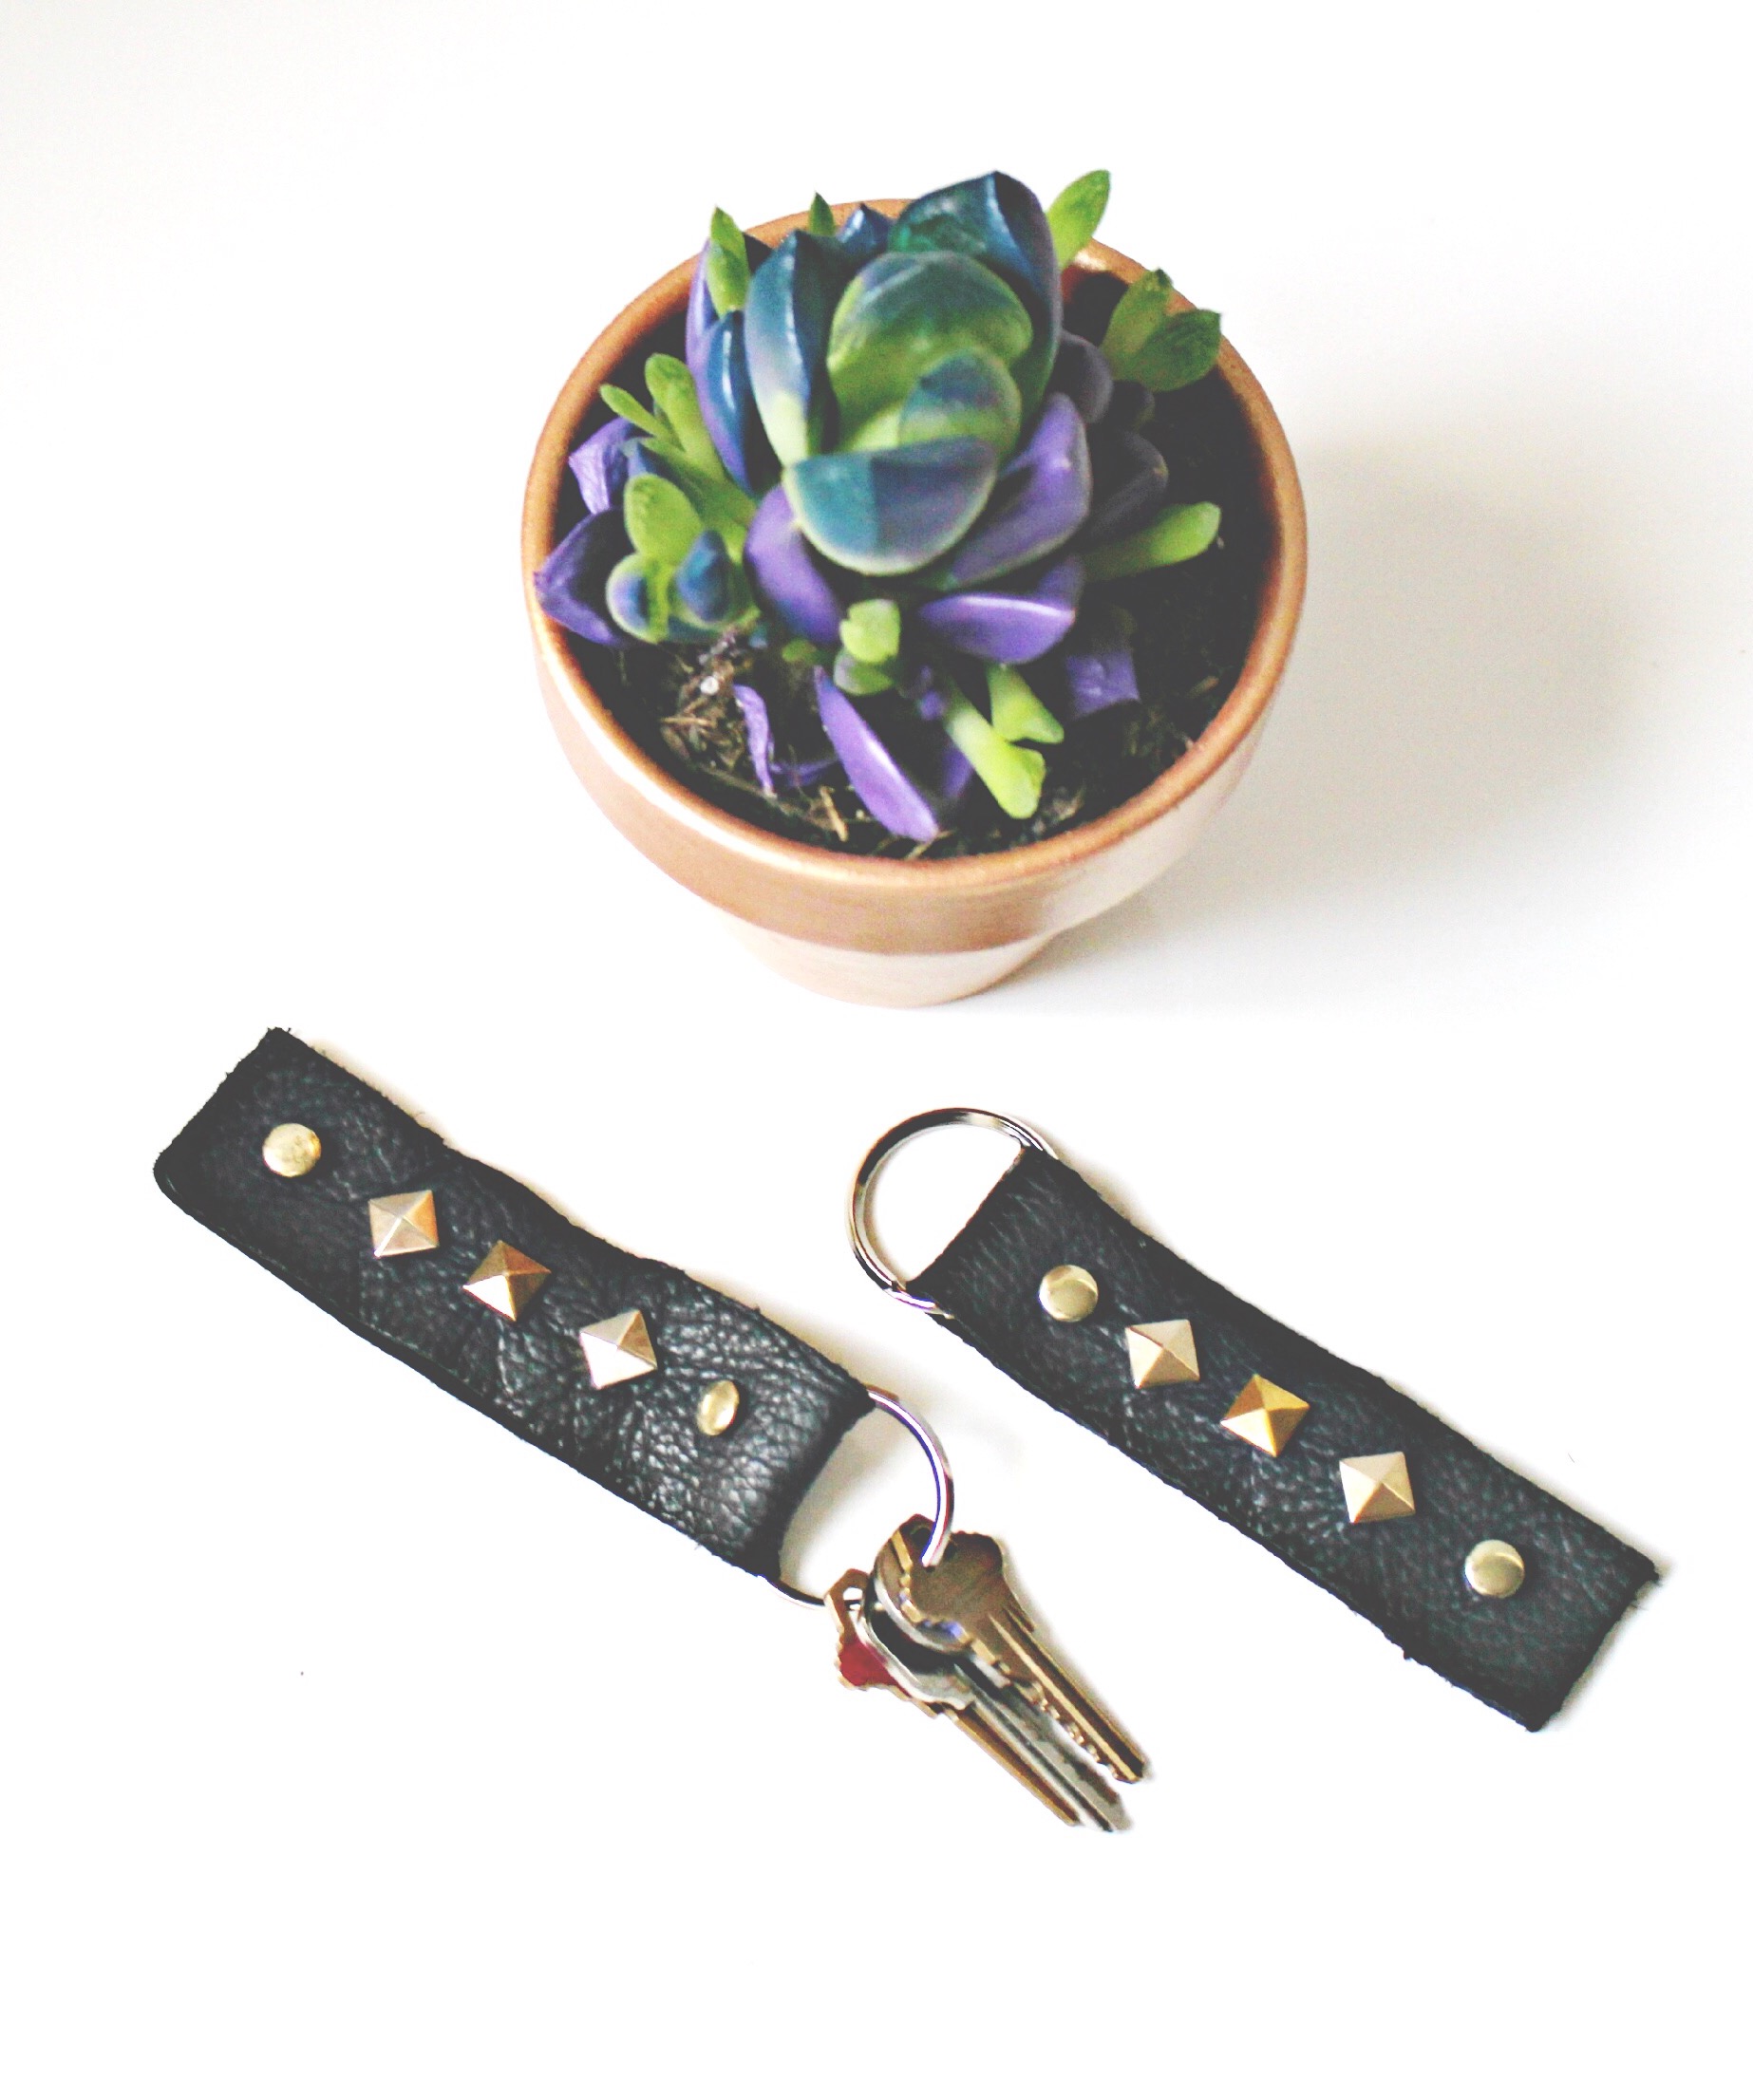
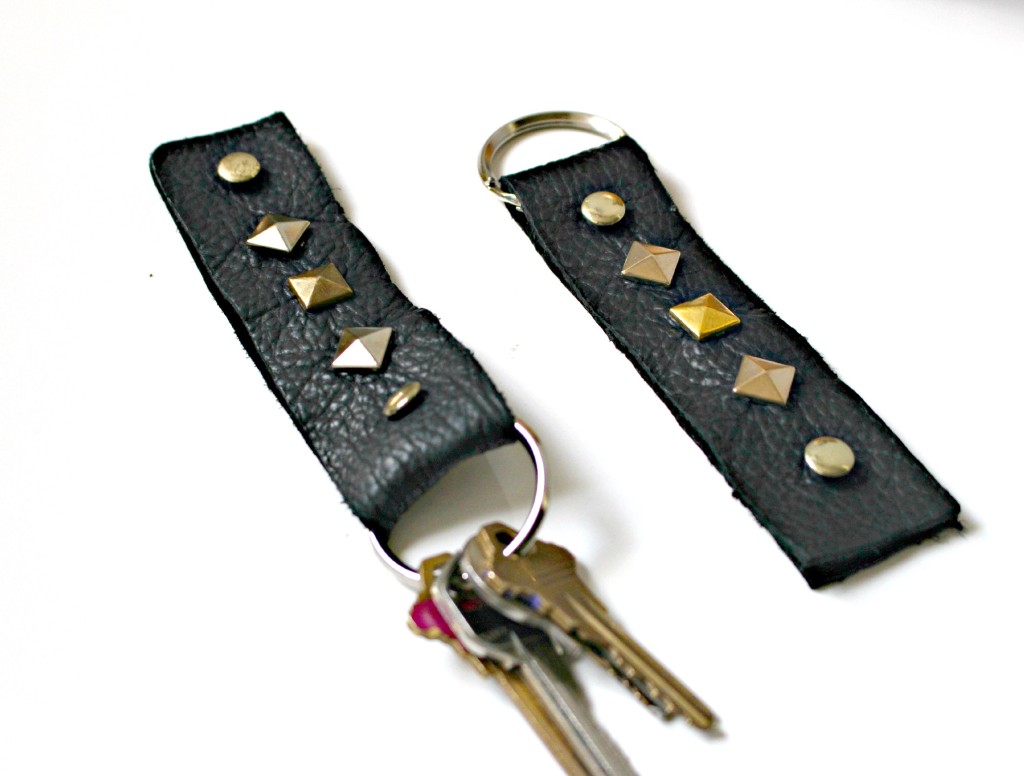
About a week ago my key chain completely fell to pieces. So my keys have been chillin in the bottom of my purse for far too long. I wanted to get a good quality keychain that could hold its own against all my purse essentials (my purse gets tossed around a lot. My bad). I looked for some online and realized all the leather ones, though pretty, were quite expensive. I remembered that Hobby Lobby had a nice leather crafting section, so I decided to make my own! It turned out really cute, and it was pretty simple.
Supplies:
- A sheet of leather- I bought a black, textured piece of leather for $3.50. It made three keychains.
- 1 1/4″ Nickel Split Key Rings– This pack was only $2.00!
- Assorted rivets- I purchased a variety pack that had both silver and gold, and S/M/L sizes. The pack was $8.00 and I used my 40% off coupon so it was only about $4.80
- X-ACTO knife or scissors
- Assorted studs- I usually order mine on ebay. They’re really cheap and they come in different finishes and sizes.
- Flathead screwdriver
Directions:
- Cut the piece of leather into three, 3mm strips (or slimmer/larger if you wish).
- Put the piece of leather through the key ring, and fold it over so the edges line up.
- Using an X-ACTO knife, or scissors, cut a hole a little below the keyring, for the first rivet. Make sure to cut all the way through both pieces of leather.
- Put the “bottom” piece of the rivet through the back of the keychain, all the way through the top piece of leather. Place the “top” of the rivet onto the bottom, and snap into place. Make sure its secure.
- Add the assorted studs to only the front piece of leather. Stick them through the leather and use the screwdriver to press the prongs into the back to hold it in place.
- When you get to the end of the keychain, repeat step #4.
Its a little time consuming because you’re dealing with so many small pieces, but its worth it! Im really happy with how mine turned out.